
| Getting Started | Advanced Topics |
Advanced Topics
Select one of the following advanced topics to learn more or simply scroll to skim.
Layout
Element Appearance
Photo Properties |
Balloon Properties |
Balloons with Images |
Cell Clipping |
Colors and Gradients |
Installing Fonts |
Copy and Paste |
Copying Properties |
Others Topics
Grid layout
If you wish to create your own traditional comic book layout, you can use Strip Designer's Grid Layout feature. Many templates already use a grid layout that you can modify to fit your needs.
Pages in Strip Designer can contain two different kinds of cells; "Attached" and "Detached". Attached cells are attached to the grid layout, and cannot overlap with other attached cells. Detached cells can be positioned freely and float above and below other cells in the layout.
To create a template with a grid layout, simply select the "Create your own" category in the list of template categories, and pick "Create Layout".
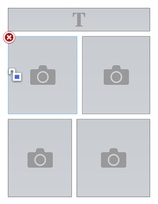
To modify the grid layout of an existing page in the comic, tap on 'Page' and then on 'Layout'.
 |
→ |  |
To add additional cells to the grid layout, tap on 'Add cell' and drag the cell with the style you wish to add onto the page where you want it positioned. The other cells will move organically to make room for the new cell.
Cells can contain both text and images (photos), and you can also add "Filler" cells to add additional space in the layout.
To delete cells, simply select a cell by tapping on it once, and tap on the red cross in the upper left corner of the cell. To adjust cell sizes, simply drag the dividers around the cells to adjust their size.
If your page contains detached/overlapping cells these will not be displayed while editing the grid layout.
Manipulating Cells
On pages created from most templates, you can alter the position of photo cells and add cells for photo and text
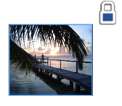
To change the position, size, or rotation of a cell, start by tapping the lock icon next to the cell:
 |
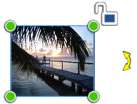 |
Once unlocked, you can drag the cell to move it. For detached cells you can drag its corners to resize it, or drag the yellow double-arrow rotate symbol, to rotate it. For attached cells, drag the dividers around the cells to adjust cell sizes.
![]() Tap the "cross" above the unlocked lock to remove the cell and its content from the comic.
Tap the "cross" above the unlocked lock to remove the cell and its content from the comic.
 |
 |
Tap "Order" to raise the photo-cell to the front of the layout or put it at the back of layout.
Tap "Snap" at the top of the screen to alter coordinate snap (moving/resizing/rotating).
Adding additional cells
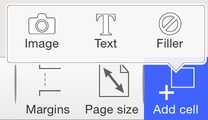
To add additional cells, tap the add button and then "cell".
 |
and |  |
Drag the cell type you wish to add onto the comic. You can add both attached and detached cells. Attached cells will automatically reposition other attached cells to avoid overlap. Detached cells can be positioned freely.
Page Setup
Press the "Page" button to
change background color, size of the comic, or select a different layout template.
You can change background color and cell border colors by tapping on Colors. Change the size of the page by tapping "Size".

 To change the layout or template, tap "Layout". Then to change
template tap "Template".
When you select a different template, Strip Designer will automatically attempt to reposition photos and other items on the new layout.
To change the layout or template, tap "Layout". Then to change
template tap "Template".
When you select a different template, Strip Designer will automatically attempt to reposition photos and other items on the new layout.
Tap "Colors" to change the background and cell's border colors (if there are borders) of the comic.
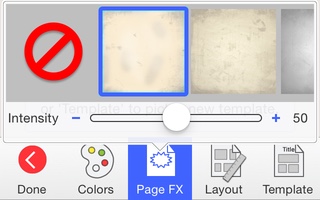
You can use the "Effects" to make the page look old.
Multiple Pages
![]() You can add additional pages to your comic. Tap on it to reveal the list of pages and add
pages.
On iPhone and iPod touch devices the "page-flap"
will appear if you tap on 'Page'. On iPad the page flap is always visible
in the lower left corner of the screen.
You can add additional pages to your comic. Tap on it to reveal the list of pages and add
pages.
On iPhone and iPod touch devices the "page-flap"
will appear if you tap on 'Page'. On iPad the page flap is always visible
in the lower left corner of the screen.
Note: Multiple pages are not available on some older devices.
Once the page list is revealed you can tap on the plus-sign at the bottom of the list to add additional pages. When adding new pages, you are asked to choose a layout for the new page similar to when you create a new comic. You can tap on the individual pages to switch page.
To change page order hold your finger on a page until it starts to repeatedly shrink and grow. Then drag the page to move it.
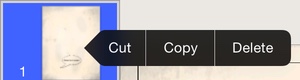
Tap on the current page to reveal the "Delete" button that enables you to delete the page.
Layers
You can alter the order in which elements are drawn on the comic page.
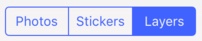
![]() To see the list of elements and which order they are displayed in, you have to reveal the "drawer"
on right edge of the screen by tapping on the "flower" icon in the lower rigth corner.
To see the list of elements and which order they are displayed in, you have to reveal the "drawer"
on right edge of the screen by tapping on the "flower" icon in the lower rigth corner.
Note: The drawer is only available in landscape mode on large screen devices.
Once the drawer has been revealed you can see the list of layers by tapping "Layers"
Now you'll see a list of the elements appearing in the comic. The elements are shown in the order they are drawn. Elements towards the top of the list are drawn last (on top of elements below). Elements slightly indented, are clipped to cells below them. You can select an element by tapping on it in the list. You can toggle wether it is locked (so it cannot be selected) by tapping the lock icon next to it.
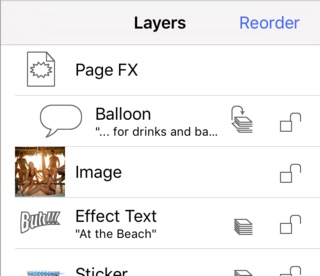
Elements shown with the stack and arrow symbol will automatically be pulled to the top when selected. You can toggle this behavior by tapping the icon.
|
|
and |
|
| Pull to top | No pull |
Tapping "Reorder" enables you to change the order elements are drawn in by dragging the little thumb next to them.
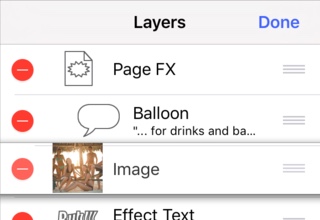
Once you are done changing the element order, simply tap on "Done".
Photo Properties
When selected, you can tap on the following icons to alter the appearance of a photo:

|
Photo filters (e.g. Brightness, contrast, sharpness, sketch/cartoon look). |

|
Paint on the photo. |

|
Vignette style and colors. |

|
Frame type, size and color. |

|
Horizontal/vertical flip, and fine-adjustment of position, rotation, and size, within the cell. |
Balloon Properties
Once you have selected a balloon, you can change the following speech balloon properties by tapping the corresponding icon at the bottom of the screen:

|
Font and text size for the balloon. |

|
text, background, and border colors. |

|
Text alignment within the balloon. |

|
Balloon's outline style and shadow. |
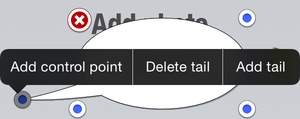
Tail control
You can add additional tails to balloon, and add additional control points to adjust the balloon tails, by holding on the tail of the icon until the tail menu appears:
Text size fitting
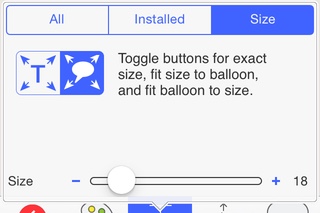
You can ensure that the balloon's text fits the balloon in two different ways by toggling the two text-size buttons:

When the "T" with arrows symbol is enabled, the text is scaled to fit the balloon. I.e. if you resize the balloon or change the text, the font will be scaled accordingly so that the text fits the balloon.
When the balloon-with-arrows symbol is enabled, the balloon is scaled to the text size. I.e. if you change the text or font size, the balloon is scaled to match the new text or size.
Disable both to control the relationship between font size and balloon manually.
Balloons with Images
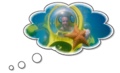 Instead of inserting text in a balloon, you can also add images. To change the balloon style from a text-balloon to an image-balloon,
select the balloon and tap on "Shape", and then tap on the camera icon next to "Contains image".
To insert an image into the balloon, double tap on the balloon as if it were text.
Instead of inserting text in a balloon, you can also add images. To change the balloon style from a text-balloon to an image-balloon,
select the balloon and tap on "Shape", and then tap on the camera icon next to "Contains image".
To insert an image into the balloon, double tap on the balloon as if it were text.
|
|
and |
|
You can alter the appearance of the image, by tapping on "Image", and apply image filters by tapping on "Filters".

|

|
Cell Clipping
Clipping a balloon to the cell it belongs to, can be used to separate that particular story element more from the rest of the comic. Balloons, stickers, and effect text can be clipped to the frame they reside in.
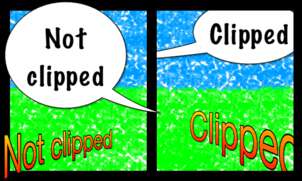
To enable clipping for an item, select the item you wish to clip, tap on the Shape buttons:
|
|
or |

|
and toggle the clipping button to turn clipping on or off:
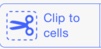
Colors and Gradients
In general, you pick colors from the built-in palette. To select different colors tap on the the color-wheel. For fill colors, you can often use a gradient instead of a solid color. Tap on the gradient symbol to see gradients. Tap on the palette symbol to use the conventional palette.
| Palette | |
| Color Wheel | |
| Gradient Fill | |
For gradients you can pick the angle by dragging the line between the two circles. At this time you can only use predefined gradients.
Installing fonts
You can install additional fonts that you download from the internet. To do this:
- Select font for a balloon or text box.
- Tap the expansion button (only on devices with a small screen) and then the "Install" button.
| and |
- Tap + and navigate the internet to find a TTF or OTF font for download.

Copy and Paste
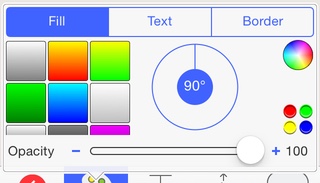
To cut/copy an object, select the object, then tap on the object again. This will reveal the cut/copy menu.
To paste, make sure you have not selected an object, touch and and hold the screen for 1 second, then release. This will reveal the paste menu option.
|

|
Copying Properties
You can reuse speech balloon settings easily, to make all balloons match the same style.
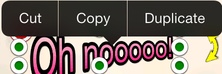
If you select and object, and then tap again on the object (as with copy and paste), you can tap the right arrow, and select either "Use as defaults" or "Apply defaults".
If you choose "Use defaults" the balloon's settings are used as default settings for subsequently created balloons.
If you choose "Apply defaults" the balloons settings are changed to match the current default settings.
Effect Text
Effect text is text that you can bend and add texture to, which can be useful for titles and exclamations. Tap "Add" and "Effect text", and select one of the templates to add the text. The text can be manipulated in many ways, and the template settings will not confine you to a specific look, but can help you get started.
|
and |  |
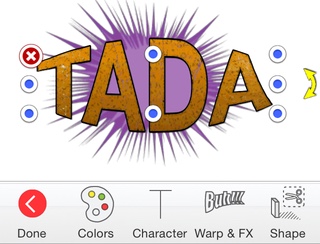
You can alter font, border and fill color of the text by tapping the relevant buttons at the bottom of the display. Drag the corners to resize the text and the yellow arrows to rotate it. Drag the middle control points to stretch the text.
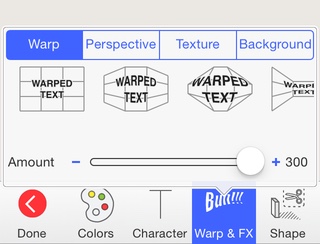
Change the bending of the text by tapping warp. You can select one of the predefined warp-effects or drag the green control buttons to adjust the warp.
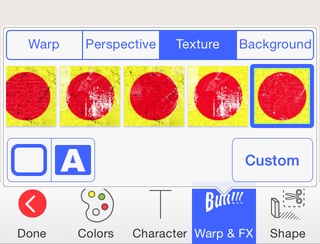
You can also add a texture to the text by selecting "Texture" under "Warp and FX". Textures can give you text an old look. You can also insert your own images as text, by tapping "Custom". Textures are multiplied with the color of the text, so if you simply want the text filled with a custom image, you need to select white as the fill color. You can move the texture, by dragging and pinching when you have selected "Warp and FX" and "Texture".
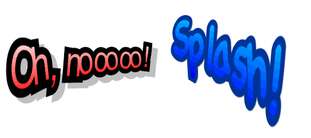
Finally, you can attach a background to a text (i.e. clouds). Select a background from the "Background" palette.
Hint: Play with gradients and texture, use the border width of a effect text (under "Color" and "Border") and change the character spacing and rotation to create interesting text effects:
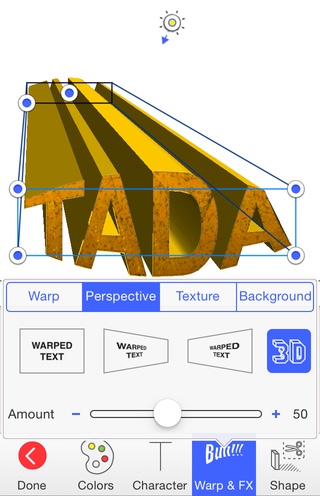
3D Extruded Text
You can add 3D depth to your text by using the 3D option of the perspective settings of effect text. You can control the direction of the depth and the angle (low angles result in more extreme perspective) by dragging the two controls at the rear of the text. You can also control the light direction by dragging the light-bulb control around the text. The depth shade color is set under 'Shade' in the 'Colors' settings of the text.
Custom Stickers
To add a custom sticker, select "Custom Stickers" as category. Tap "+" in the lower right corner of the list to add a new sticker to the library. When you add a custom sticker to your library, you'll be presented with the sticker editing screen, where you can crop and mask the image.
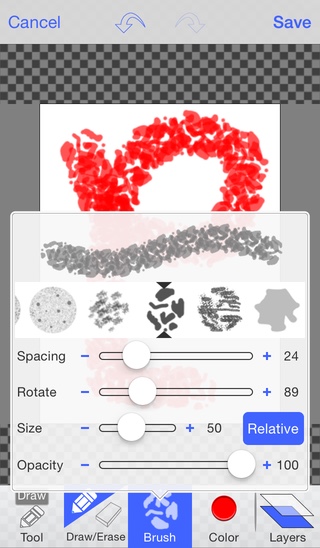
You can alter the cropping area of the sticker by dragging the 4 green markers surrounding the image. You can both paint and mask out portions of a sticker. Toggle between painting and masking by tapping "Mode" in the lower left corner. Use the eraser to create the mask.
When painting you can select brush color (by tapping color) and brush settings by tapping "brush". When masking you can select additive or subtractive masking by tapping the "+" or "-" at the bottom of the screen, and choose masking brush style by tapping "brush".
You can zoom and pan on the sticker editing screen by pinching and dragging with two fingers.
Tip: Brush sizes can be set to exact pixels or approximately the size of a finger. Set brush size to finger-size, and zoom out to paint large areas.
Custom stickers can always be edited again, by tapping the "Blue arrow" icon to the right of the sticker in the list.
Note: Altering a sticker, will alter its appearance in all comics that you have used it in.